This is the fuel filter part # that fit my car. It comes with a large green seal that goes around the fuel filter housing cover, a series of blue seals that are hooked to each other and a metal washer to replace the one underneath the blead screw.

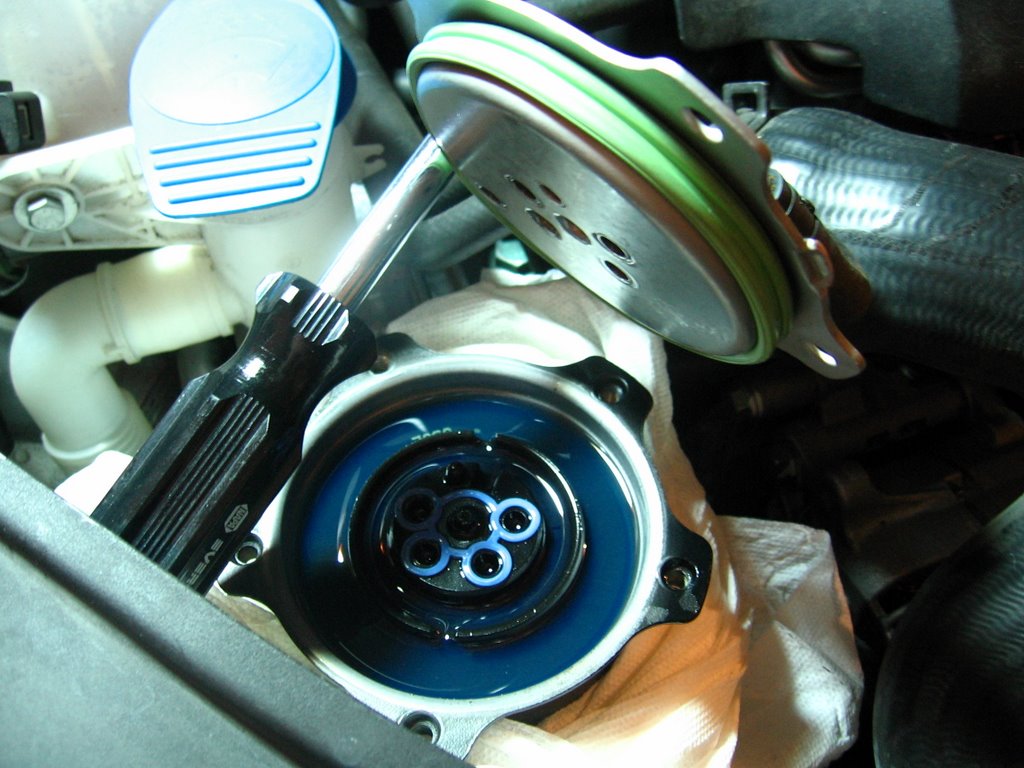
This is what my fuel filter looked like from the top. Five torx screws hold the filter housing cover on and there is one torx bleed screw in the middle. Make sure your car is shut off and back the bleed screw off by a couple turns. There should be no pressure on the fuel system at this point. Remove all five screws from the fuel filter housing cover.
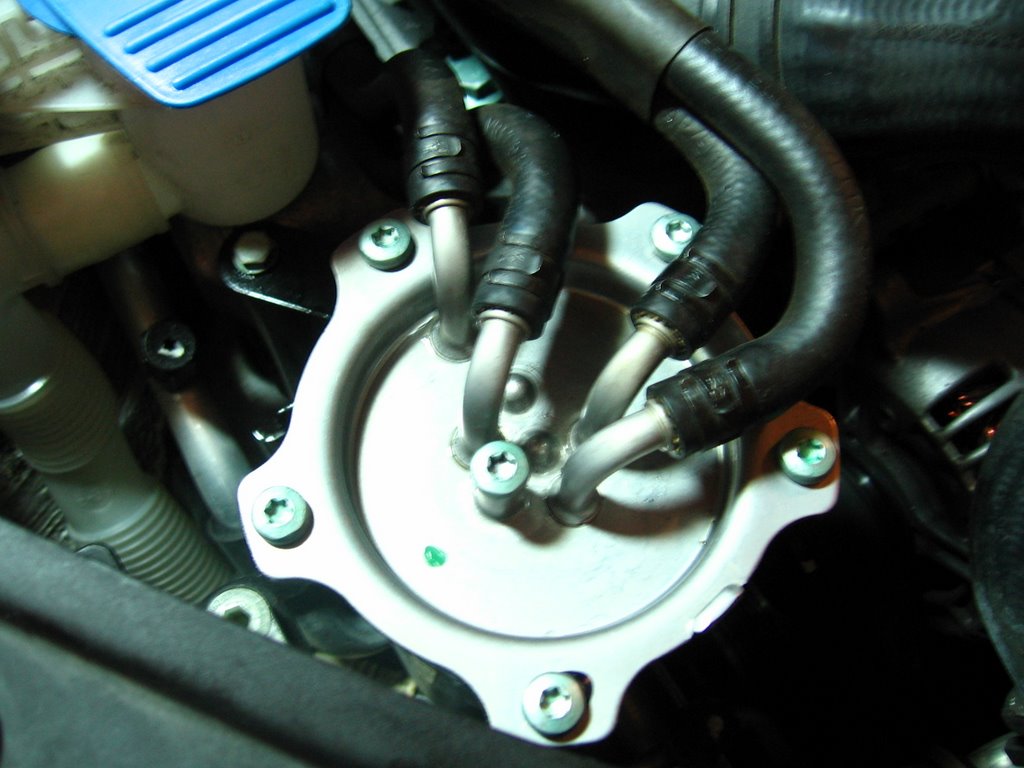
In the photo below you can see the large green seal on the filter housing cover. This must be changed with the replacement. I did see some grit on the tabs of the filter housing and gently removed it away from the opening of the filter housing. NOTE: I wrapped the filter housing to catch any diesel that might drip over the sides of the filter housing. If you're careful and pull the cover up very slowly you can easily contain any diesel drips. Beware, there is fuel that will drip out of the holes in the filter housing cover that are attached to the black fuel lines but you can shake it out into the fuel filter housing. See the holes below?
The filter element is attached to a black plastic assembly with two seals on the inside. During my experience the two seals on the inside held on tightly during the entire removal of the filter element. I had to carefully rotate the filter and pull up at the same time. If you pull too hard too fast you WILL sling diesel out of the housing and onto your engine. Pull it out slowly, you'll be fine. I cut a washed out milk jug in half and put it to the side of the filter housing to put the fuel filter into.
The next step is to put in the new fuel filter. Learn from my mistake and push the filter down slowly. I was a little over excited about changing the fuel filter myself and pushed down a little too quickly as I was putting in the new filter. There was fuel on the bottom of the filter housing and it squirted diesel up and out of the housing kind of like when you cup you hands in water and squeeze them together.
Once the filter is fully seated you need to replace the blue seal assembly shown below. It didn't stay on very securely and I was careful not to shift the seal during the replacement of the filter housing cover which actually has alignment pins underneath it so the seals will mate to the filter housing cover properly.
Now I have read that some people fill up the housing with diesel before they put the cover back on. I didn't have to because I didn't remove any diesel from the filter housing and I must admit I'm still not sure where water in this fuel filter gathers. I've read that it gathers in the filter assembly and is removed during the filter change, but I can't confirm that. Post an anwer if ou know. Okay,...let's get back to the filter change. Tighten each torx a few turns at a time as you alternate from one side of the cover to the other. This will help bring the cover and green seal straight down and not crooked. At this point the cover was tightened completely and I had the bleed screw backed off a few turns. REMOVE ALL paper towels/rags and tools. My wife watched the bleed screw as I turned the ignition one turn WITHOUT turning the engine over. She saw small diesel bubbles come out from the screw threads and I turned the ignition off. I repeated this one more time and she didn't see anymore bubbles. Air moves easily around the threads but the thicker diesel does not. I tightened the bleed screw down completely with the new bleed screw washer and then turned my car on. It ran perfectly after the change.